This easy-to-make pita bread is the perfect sandwich bread, holding all of your favorite fillings and spreads within its round shape. Light, soft, and puffy, it’s great for sandwiches, especially for kids' school lunches.

This is another constant winner in our household. I make a large batch about once a month and freeze any leftovers that aren’t eaten within two days. It's been in my head for years, so I used AI to turn it into an actual recipe:
I need you to create a perfect and easy soft and puffy pita bread recipe based on the ingredients and instructions I provide. It should follow typical format of recipe and not exactly the one I write - for quantities, convert to the American way and put the metric too in brackets. and and you should adjust wording and name of recipe, tools and ingredients to use proper ones. In addition, provide number of servings, total prep time (without fridge time) calories per serving. Give it a description around ease of making and how it is the perfect sandwich bread because it holds all of the fillings/spreads within it thanks to it's round shape. The ingredients should be: Part 1: activating yeast: 3 cups warm water (not too hot). 2 teaspoons dry yeast (14 grams). 4 teaspoons of sugar. Part 2: flour: 1000 grams white flour. 4 tsp salt.
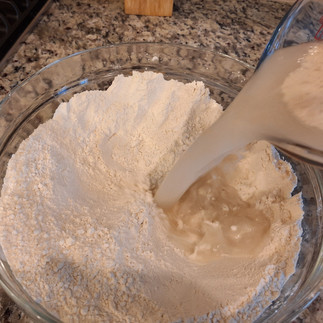
To make the pitas-part 1- mix the sugar and yeast with warm water and let sit for 15 minutes, until yeast forms foam and is visibly different. At the same time, mix flour and salt. Set aside about 1/3 of the flour mix. This helps with hand kneading, because you later add flour gradually and it is easier to start kneading with a sticky dough. Pour the yeast and sugar mix into the 2/3 flour salt mix and knead until even (it will be super wet and sticky but the point is getting rid of lumps). Gradually add the rest of the flour until the dough is elastic but not sticky. Set aside for about 2 hours. After 2 hours, divide the dough to ~100gr balls (make them round, you can do that by stretching all the dough to one side and putting the ball on the side with the connection point). let balls sit, covered with fabric that isnt heavy for about 15 minutes.
Preheat the oven to 500 degrees f. When hot, change the setting to broil on 500 f. On a tray, put parchment paper. Take each ball and using a rolling thingy flatten it to about 15 cm diameter. lay as many pitas as you can without them touching each other in the tray and put in the oven, it should be in the center of the oven. Look at the pitas, and the moment you see a visible rise (should be about 3 minutes), open the oven and turn them over. Close the oven and observe. The pitas should rise but not crack. If they crack, they will dry out, so if you see a crack, immediately take them out. The pitas should stay white. Remove ach pita when it is nice and round and not cracked yet (usually 1-2 mins after turning). Set to cool on a net (so the steam doesn't make them wet). Repeat the process until all pitas made. Whatever you don't eat within 2 days should be frozen for later use. add something about being the prefect sandwich bread for kids for school. It yields 18 pitas. also you need to put some flour on the parchment paper where the dough balls will rest.Here's the final recipe, forever on the internet for others to enjoy:
*I used this scale. I love it because it is so easy to switch units and it has a large surface which is great for big bowls.
Servings: 18 pitas
Prep Time: 30 minutes (excluding rising time)
Cook Time: 15 minutes
Total Time: 45 minutes
Calories per Serving: Approximately 160 calories per pita
Perfect Puffy Pita Bread RecipeThis easy-to-make pita bread is the perfect sandwich bread, holding all of your favorite fillings and spreads within its round shape. Light, soft, and puffy, it’s great for sandwiches, especially for kids' school lunches. IngredientsFor Activating Yeast:
For Dough:
Tools Needed
Instructions
Enjoy these perfect puffy pitas as a sandwich bread that holds all your favorite fillings and spreads securely, making them ideal for school lunches or any meal. |


This is the scale I used. I love it because it is so easy to switch units and it has a large surface which is great for big bowls.
Great recipe!
I tried these and it was a huge success! I would use maybe 25% less salt though.