This creamy, protein-packed skyr is lightly sweetened and infused with real vanilla for a perfect balance of flavor and texture. Enjoy it as a versatile breakfast, snack, or dessert that’s as rewarding to make as it is to eat!

I enjoy making yogurt because it's simple and healthier than store-bought options. However, I recently tried an incredibly delicious vanilla Skyr (Icelandic yogurt) that was so tasty, I had to give it a go. It's creamy, thick, rich, and less sour.
I first wanted to understand what the difference is between Skyr and regular yogurt, so I asked ChatGPT:
What is the difference between skyr and regular yogurtIt explained:
Skyr and regular yogurt are both cultured dairy products, but they differ in texture, taste, and nutritional profile due to their preparation methods and origins: 1. Origin
2. Texture
3. Taste
4. Fat Content
5. Protein
6. Production Process
7. Culinary Uses
In summary, skyr is thicker, higher in protein, and milder in taste than regular yogurt, making it an excellent option for those looking for a creamy, nutrient-rich option. |
Sign me up! I want to make this. I asked:
Can I make skyr at homeSo it gave me a recipe:
Yes, you can make skyr at home! While the process is similar to making yogurt, it requires specific steps and ingredients to achieve the authentic thick and tangy texture. Here's how you can do it: Ingredients
Instructions1. Heat the Milk
2. Add Starter Culture
3. Add Rennet (Optional)
4. Incubate
5. Strain
6. Chill and Serve
Tips
Making skyr takes some time, but the results are worth it for a delicious, protein-packed treat! |
I wanted a delicious vanilla version:
I want to add vanilla bean and a bit of sweetness (about 6 grams per serving). Please update recipeSo it gave me a recipe:
Here's the updated recipe with vanilla bean and sweetness added: Ingredients
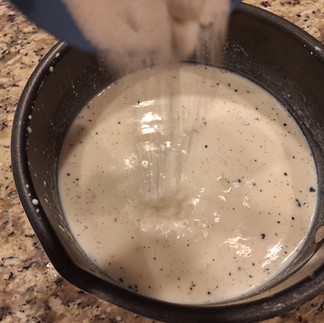
Instructions1. Heat the Milk
2. Add Starter Culture
3. Add Sweetener and Rennet (Optional)
4. Incubate
5. Strain
6. Chill and Serve
Notes
This version has a touch of sweetness and a fragrant vanilla note, perfect for a balanced and delightful treat! |
Oops, I didn't follow the instructions exactly:
I didn't add the pod..No problem, it said, and updated recipe:
Got it! Here's the revised recipe excluding the vanilla pod: Ingredients
Instructions1. Heat the Milk
2. Add Starter Culture
3. Add Sweetener and Rennet (Optional)
4. Incubate
5. Strain
6. Chill and Serve
Notes
This version keeps things simple, focusing on the seeds for vanilla flavor! |
I then wanted to ask about adding the sugar but had a typo, which it interpreted as starter:
Can I add the star immediately after removing from heat?It responded to the starter interpretation:
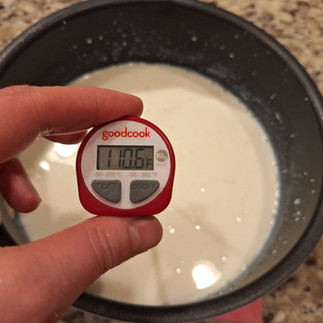
Yes, you can add the starter immediately after removing the milk from heat, as long as the temperature has cooled to about 100-110°F (37-43°C). Adding the starter at a higher temperature could kill the live cultures, preventing the skyr from fermenting properly. To streamline the process:
This ensures the live cultures remain active and ready to ferment. |
So I had to correct myself:
Sorry I meant the sugarAnd it made the necessary adjustments:
Yes, you can add the sugar immediately after removing the milk from heat. It will dissolve more easily while the milk is still warm. However, let the milk cool to 100-110°F (37-43°C) before adding the starter, as high temperatures can harm the live cultures. Adding the sugar right after heating simplifies the process without affecting the fermentation. |
Makes sense. So I asked for an updated recipe:
Ok update recipe for sugar after taking off the cooktopIt did:
Here's the updated recipe with sugar added immediately after removing the milk from the heat: Ingredients
Instructions1. Heat the Milk
2. Add Sugar
3. Cool the Milk
4. Add Starter Culture
5. Add Rennet (Optional)
6. Incubate
7. Strain
8. Chill and Serve
Notes
This method integrates the sugar smoothly while maintaining an optimal fermentation process! |
In the morning I went to check on my yogurt and found out it curded. I paniked:
Overnight the yogurt has separated a bit so that the way and the yogurt / cheese are distinctly visible. Is that normal? The pot was left in the oven turned off but with the light on maybe it was too hot?It tried to calm me down:
Yes, it’s normal for the yogurt to separate into curds (yogurt/cheese) and whey, but it can sometimes indicate that the fermentation conditions weren’t ideal. Here’s what might have happened and how to adjust next time: Why It Separated
What to Do Now
How to Adjust Next Time
Separation isn’t a failure—it’s just part of the process and can often lead to an even thicker, creamier skyr once strained. |
I have made yogurt in the past, and it never curded, so I was freaking out and probably exaggerating:
It curded so much that I made cheese. After 30 minutes of straining, there's about 1.5 Sharon cups of yogurt leftIt tried to save "what's left":
It sounds like your skyr fully curdled into a cheese-like consistency! This is likely due to the heat being too high during fermentation, causing the milk proteins to over-coagulate. While it’s not the intended result for skyr, it’s a happy accident—you’ve essentially made a soft fresh cheese (similar to quark or farmer’s cheese). Here's what you can do: What Happened
What to Do With It
How to Avoid This Next Time
This cheese is a wonderful result in its own right, and with a few tweaks next time, you'll be back on track for silky skyr! Let me know how you decide to use your homemade cheese. |
Not very successfully, I thought:
Herbs and garlic with vanilla and sugar?It responded:
Ah, fair point! With vanilla and sugar already in your "cheese," savory additions like garlic and herbs would definitely clash. Instead, focus on sweet applications or neutral adjustments. Here are some ideas tailored to the vanilla-sweet flavor base: Sweet Applications
Neutral AdjustmentsIf the sugar and vanilla flavor are mild, you can transform the cheese into something more versatile:
Since it already has a sweet profile, leaning into desserts or breakfast ideas is likely your best bet! Let me know which direction you’d like to go, and I can refine ideas further. |
I then decided to put the whatever-came-out in a container, and when I tasted it, it was actually the right texture and delicious. I may have overdone it with the culture (rennet). I said:
Actually, once I put it in a serving tool, it came out well, just very consistent/thick in texture.. I think the over curding and consistency may have been because I added too much rennet to it. (1/4 teaspoon)We were troubleshooting, it said:
That makes sense—1/4 teaspoon of rennet is quite a bit for a small batch like this. Rennet is very potent, so even a few drops can significantly impact the texture. For skyr, using around 2-3 drops or 1/16 teaspoon (if measuring is possible) is usually sufficient. It sounds like you still ended up with a great result, albeit much thicker! You could adjust the amount of rennet next time for a creamier, more traditional skyr consistency. Would you like tips for incorporating less rennet into future batches? |
Only, I used powdered rennet:
it was powder form not dropsNow everything was resolved:
Ah, powdered rennet explains it! Even in powdered form, 1/4 teaspoon is a relatively high amount for small batches of skyr. Typically, you’d use a pinch (about 1/32 teaspoon) or dissolve a small portion in water and use just a few milliliters of that solution. Adjusting the amount will help avoid over-curding next time. Would you like a detailed breakdown for using powdered rennet in small-scale recipes? |
So I asked for the recipe for easy copy, and here it is:
Servings: 4
Calories per Serving: ~120
Time to Make: ~24 hours (including fermentation and straining)
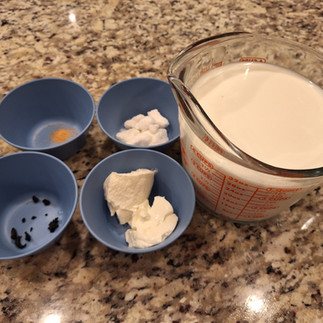
Homemade Vanilla Skyr (Icelandic Yogurt) Ingredients:
Instructions:
Nutritional Value (Per Serving):
|











Comments